DIY Dried Orange Slice Garland for some Scandinavian, old world style, Christmas Decor.
This post may contain affiliate links. Read my disclosure policy here.
Well, I finally did it.
I didn’t get Christmas decorations up before thanksgiving.
I should be ashamed of myself.
Although, it is partly Luke’s fault because he isn’t quite as much of a Christmas-crazy-person as I am.
And I need his help to get a tree. So there ya go.
Here we are in December and I have finally gotten my act together.
Unbelievable.
One of my favorite homemade Christmas decorations are dried orange slices. They just feel so warm and festive!
I started making these the first year we were married, and I still love them so much that I have 2 strings of them hanging in different places in the house year round!
So they don’t JUST have to be Christmas decor.
What I tend to do is decorate the tree with them every year, and then when Christmas is over (noooo!) I’ll take them and hang them somewhere else.
Cause I just want to keep admiring their fabulousness.
Decorating my home with natural elements like pine cones, greenery, dried citrus, and flowers feels so elegant and beautiful. And yet minimalist and understated at the same time.
Don’t be one of those people who runs to the store to decorate with the newest trends every year. Let’s decorate with what is on hand and naturally beautiful. Let’s decorate with what generations past would have used. This is going to be an old fashioned Christmas!
DIY Dried Orange Slice Garland
Here’s what you’ll need:
- 5 to 7 oranges, depending on how long you want your garland
- a sharp knife for slicing
- jute twine, wire, string, or something to hang the oranges on
- an awl or crochet hook to poke holes in the oranges
Step one:
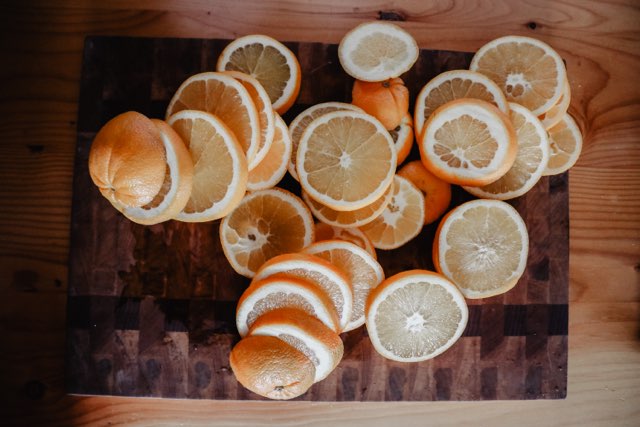
Slice all your oranges thinly. I did pretty well on most of mine, but the last few are quite thick. I just got so excited.
Don’t judge me.
Step two:
Now we are going to choose a dehydration method. There are two options for this. Either use a dehydrator, or if you don’t have one, use your oven.
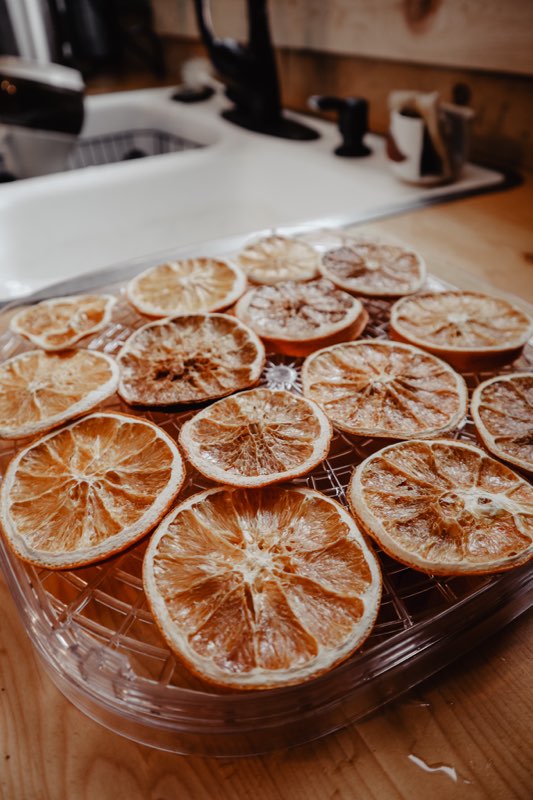
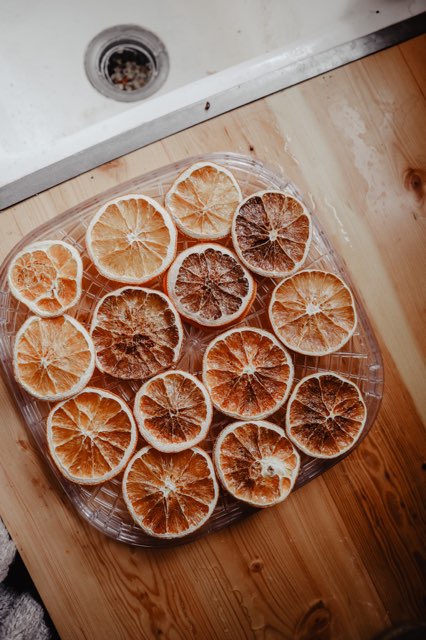
Dehydrator instructions:
Lay all the orange slices out on the dehydrator trays. Stack the trays and put the lid on. Then turn it on. If you have one like mine, it just has one on/off button so you don’t have to worry about the temp. If you have a temperature controlled one, set it to 135 degrees.
Start checking on the oranges after 2 to 3 hours, although they can take much longer for the slices to dry completely. The few thick ones I did took closer to 12 hours. I totally did that on purpose. I was just showing y’all what not to do 😉

Oven instructions:
For drying them in the oven, you are going to set your oven to the lowest temperature it can go, which for mine is 170 degrees.
Lay the oranges out on a cookie sheet and stick it in the oven.
I recommend flipping the oranges part way through since there is no airflow through the cookie sheet. But that is totally optional.
Since the oven is hotter than the dehydrator, these will dry faster. Just keep an eye on them starting at 2 hours, and make sure the edges don’t start to burn (unless, of course, that’s the look you’re going for).
Step three:
Once they are dried, take them out of the oven or dehydrator. Use your awl or crochet hook (or whatever else you can use) and poke holes in the center of the oranges that don’t naturally have any. The holes might be too small, or just because of how the fruit segments grew it might not have any. We need a hole big enough in each one to thread our twine through it.
Listen to this on your favorite podcast app!
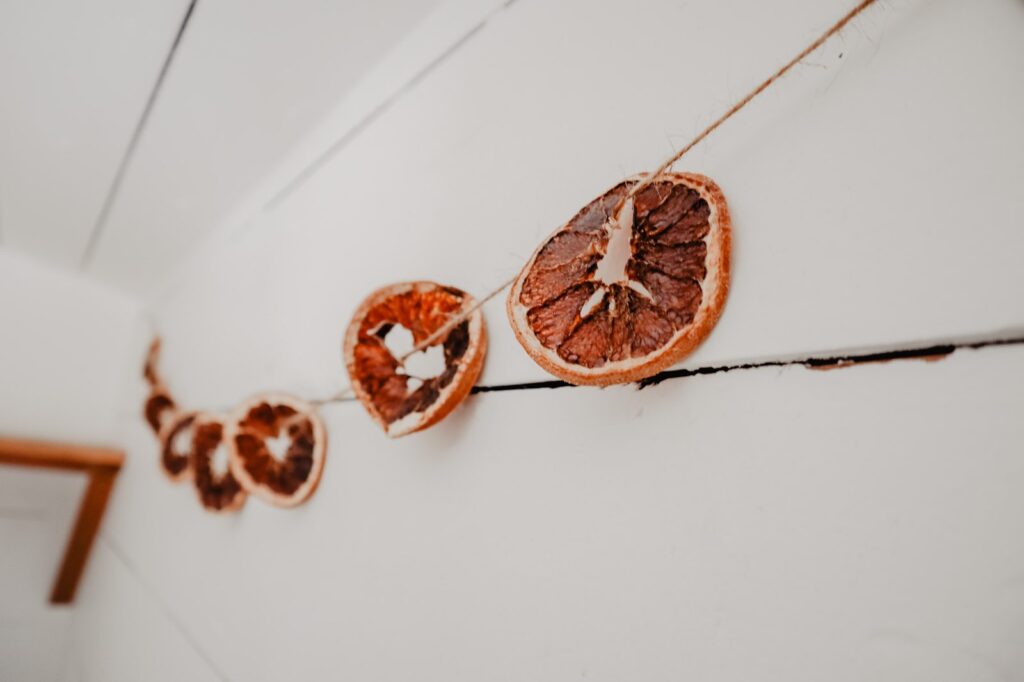
Step four:
Start threading the string or twine through the holes in the oranges. I personally like the look of jute twine for this. It gives it an extra rustic farmhouse feel. I love my jute twine. I use it for everything.
Step five:
Hang it up! You can wrap it around your Christmas tree, securing both ends to a branch. Or you can hang it on the wall, or over a window.
This year’s oranges will be going on our tree, and then I’m seriously considering doing another batch and hanging them above our kitchen window and letting the ends hang down along the window trim.
THAT would be gorgeous!

I like to arrange the oranges after it is hung, because it is hard to keep them placed properly while you are moving the twine around. So once it is hanging on the wall or the tree, I’ll slide the oranges along the twine until they are all spaced out nice and evenly. We don’t want a big clump of 8 right in one spot, if ya know what I mean. That would be entirely unclassy.
And that’s all there is to it. You can take it down after Christmas and store it. It would store well in a gallon or half-gallon jar.
Or just leave it up all year like me. Be a rebel. Leave up your Christmas decor year round. Play Christmas songs in April. Drink eggnog in July. It is fun I tell ya!
And blessings.
Pin it for Later!

Print the recipe for later!

DIY Dried Orange Slice Garland
Equipment
- A sharp knife
- Jute twine, string or wire
- An awl or crochet hook
- Oven or dehydrator
Materials
- 5 to 7 oranges
Instructions
- Thinly slice oranges
- Place them in the dehydrator (if temperature controlled set to 135 degrees)
- If you don't have a dehydrator, set your oven to the lowest temp and place the oranges on a cookie sheet inside the oven.
- Keep an eye on them and take them out when they are dried.
- Using an awl or crochet hook, poke a hole in the middle of each orange slice.
- Thread your twine through the holes.
- Either wrap the garland around your Christmas tree or hang it somewhere on the wall.
[…] DIY dried orange slice instructions […]