DIY Healthy Sunscreen Recipe
This post may contain affiliate links. Read my disclosure policy here.
Jump to RecipeI am stoked for summer.
Which is a little strange for me, because I don’t much like the heat.
Winter is my favorite season. Ahh, the sweaters, hot drinks, sitting by the fireplace, watching it snow.
But after the long winter going into spring, I find myself looking forward to a little warmth.
We have such fun things planned this summer! Camping trips (we already went on one!), hiking, days by the lake and river, working in the garden, seeing all the plants flourish.
Plus, I really need to work on my tan.
Every spring I whip up a batch of my homemade sunscreen for the family to use.
I love that this is safe for the whole family, even the babies! It is full of oils that are nourishing for your skin, so along with being a sun-block it also is very healthy!
Store-boughten sunscreen is full of chemicals that are endocrine blockers and are known to cause cancer. Definitely NOT something I want to be slathering all over myself or my family!
The way conventional sunscreen works is that the chemicals create a barrier over your skin to protect it from the sun. The sunscreen we are going to make today uses a mineral barrier. So much healthier and natural!
Makes me happy!
Watch my recipe video on YouTube.
DIY Healthy Sunscreen Recipe
Ingredients:
- 1/2 cup olive oil
- 1/2 cup shea butter (or cocoa butter)
- 1/2 cup coconut oil
- 1/2 cup beeswax
- 1/2 cup non-nano zinc oxide
- 20 drops lavender essential oil
Using a double boiler (or in my case, a pot of water with a bowl sitting inside), melt together the shea butter, coconut oil, beeswax and olive oil.
Once they are all melted, add in the non-nano zinc oxide, and whisk it in really well.
The reason you use non-nano zinc oxide instead of nano zinc oxide, is because nano is in tiny tiny little particles that can pass through your skin and soak right in. Non-nano is large enough particles that it sits on top of your skin and creates that barrier that prevents the UV rays from burning your skin.
Adding the essential oils
Then add in your essential oils! I generally like to just use lavender.
It is my favorite go-to oil for everything.
But you can choose whatever oils you’d like. A couple good options are peppermint and maleluca, because they are also bug repellents. So you get the double whammy of a sunscreen and bug repellent in one! I’ve done that if we are about to go on a camping or backpacking trip and it has worked fabulously!
Just be sure to avoid any oils that are photosensitive. All the citrus oils are, like orange, lemon and grapefruit. They react negatively with the sun and can actually give you a really serious burn.
Mixing it
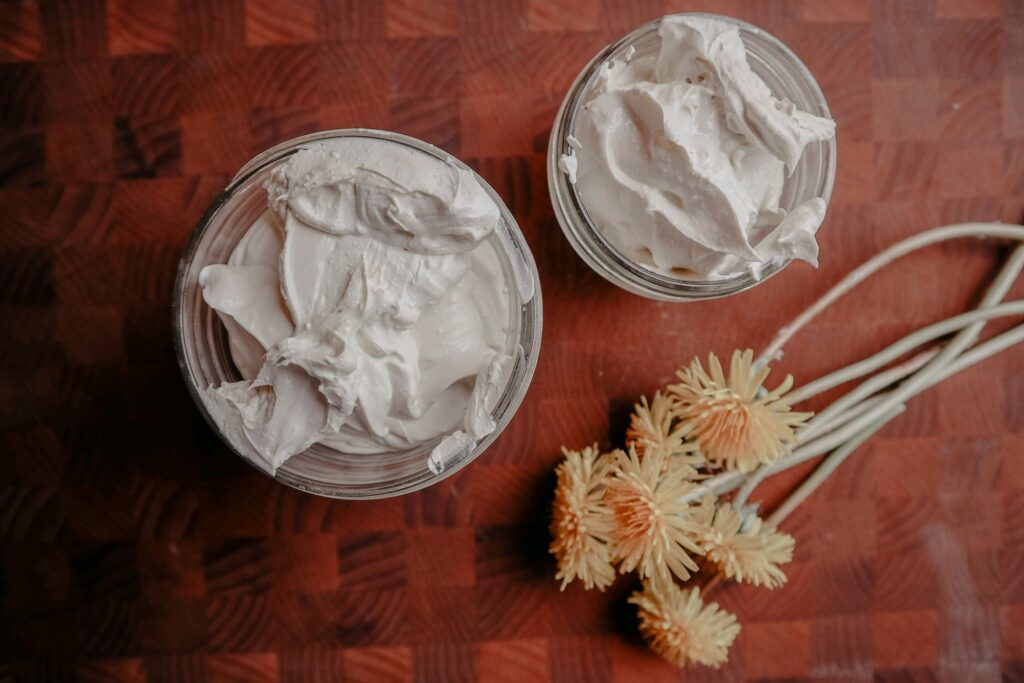
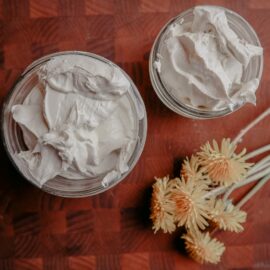
Now at this point I like to stick it in the refrigerator to speed up the hardening process. I go by every now and then to whisk it up to make sure the zinc oxide doesn’t settle on the bottom. If you put it in the fridge you just can’t forget it’s in there. I take it out when it is mostly hardened, but still a little soft. Then I whisk it, and that gives it a lovely divinely fluffy texture! But you can totally do this by leaving it out on the counter, it’ll just take a lot longer.

Storage and use
I store it in several little half and quarter pint jars so they are easy to take around with us. I put one in my husband’s lunch box and one in the diaper bag.
Now I just need to actually remember to put it on the kiddos haha I don’t burn very easily so I tend to forget that the babies do. But I’ve been doing better lately.
I try to get us all out in the sun without sunscreen for 30 minutes a day just for the vitamin D benefits. But then after that I’ll put some of this on.
It does leave a white film on your skin, which is exactly what we want. Because that means the zinc oxide is doing what it is supposed to do and sitting on top of your skin to protect it from burning.
You just re-apply it every now and then, as you notice it getting really thin. If you are swimming or playing in the water, or even doing something that makes you sweat a lot, you’ll have to apply it more often.
Listen to this on your favorite podcast app!
Sunscreen
Ingredients
- 1/2 cup olive oil
- 1/2 cup shea butter or mango butter or cocoa butter
- 1/2 cup coconut oil
- 1/2 cup beeswax
- 1/2 cup non-nano zinc oxide
- 20 drops essential oil
Instructions
- Using a double boiler (or in my case, a pot of water with a bowl sitting inside), melt together the shea butter, coconut oil, beeswax and olive oil.
- Once they are all melted, add in the non-nano zinc oxide, and whisk it in really well.
- Add your essentail oils of choice and mix them in.
- Now at this point I like to stick it in the refrigerator to speed up the hardening process. I go by every now and then to whisk it up to make sure the zinc oxide doesn't settle on the bottom. If you put it in the fridge you just can't forget it's in there. I take it out when it is mostly hardened, but still a little soft. Then I whisk it, and that gives it a lovely divinely fluffy texture! But you can totally do this by leaving it out on the counter, it'll just take a lot longer.
- I store it in several little half and quarter pint jars so they are easy to take around with us.
Pin it for later!

This recipe looks amazing and being a herbalist and aromatherapist I’m excited to try it. I do have a question, how long does this sunscreen keep? What is its shelf life?
I usually keep it for up to a year, although we used some this summer that was 2 years old and it still worked great.
Love it! I didn’t use this recipe exactly (I added mango and shea and cocoa and olive and coconut!) and threw in some ylang ylang and vanilla EO. Turned out lovely. Thank you for sharing!
Loveeee this recipe
What level of coverage would it have
Example 20% 50%
I burn to easy
Thank you Glenda
Hi what’s the spf of this sunscreen?
Since the zinc oxide is essentially 20% of the ingredients it would be 30 spf (20×1.6=32)
Hi Megan. I am going to make this today so I may not get a response in time but I’m wondering if almond oil is okay to substitute for the olive oil. I have made Rosemary Gladstar’s recipes and have almond oil on hand. Thank you for posting this recipe!