Easy sauerkraut recipe! A insanely simple recipe recipe for sauerkraut, that is full of amazing gut-boosting probiotics!
This post may contain affiliate links. Read my disclosure policy here.
Jump to RecipeThis, in my humble opinion, is the world’s best fermented food.
So you must make some instantly!
I insist.
Your small intestine is thanking you already as we speak.
I’ve already talked so many times about how important probiotic foods are for your gut. Probably sound like a broken record over here.
But man, I’ll say it again. Even at the risk of being the broken record.
Your gut needs probiotics y’all!
Probiotics help keep your digestive system functioning properly, with all the beneficial flora and bacteria. That in turn helps keep your whole body functioning properly, since health seems to stem from your gut.
Since probiotics do so much to support your immune system and regulate digestion, it’s just a no-brainer that you need to find a way to eat fermented foods daily.
You could spend exactly $99 a month on super high quality probiotic supplements (maybe a little exaggeration going on there).
Oooor you can grab a couple of heads of cabbage when you’re at the store next, at about 50 cents a pound, depending on the season, and consume your probiotics with dinner. Plus homemade fermented foods contain even more beneficial bacteria than probiotic supplements!
Benefits of fermented sauerkraut
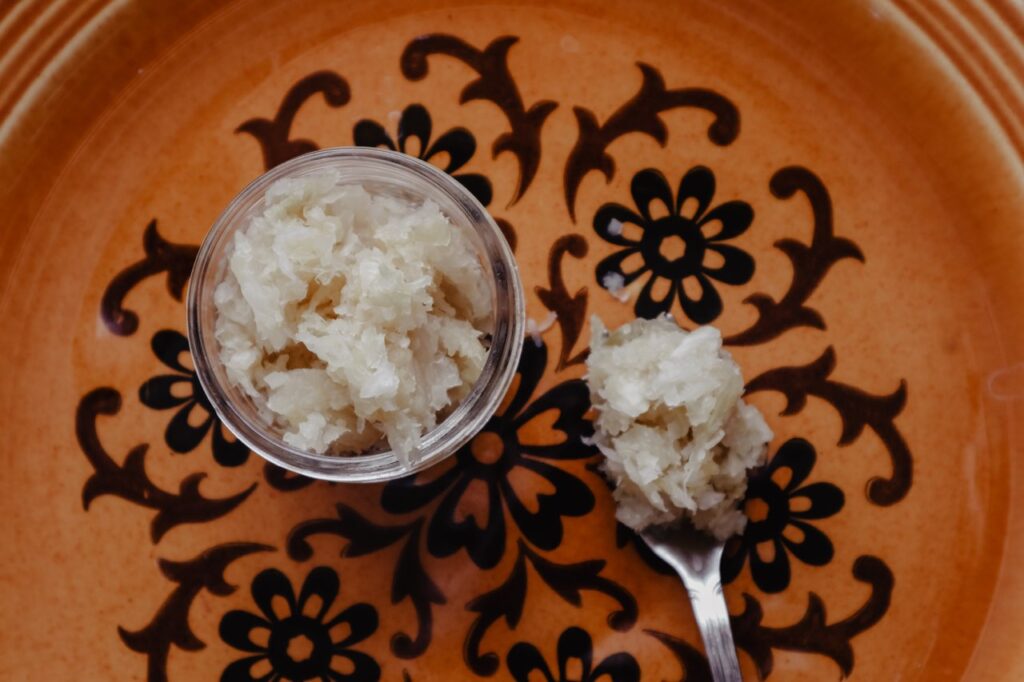
Fermented sauerkraut is beaming with probiotics. So cool y’all. All you need to do is squish salt and cabbage together and allow to sit for a few days, and there ya go! Something amazing called lactobacillus starts to populate.
This beneficial bacteria that can be found in lots of fermented foods like kombucha, yogurt, kefir, and sauerkraut, helps increase your gut bacteria. Regular consumption of fermented foods have been shown to improve digestion, increase immunity, reduce the risk of cancer, and help reduce inflammation.
So many things in today’s day and age negatively affect our gut flora. Medications, antibiotics, harsh cleaners, antibacterial soaps, steroids, sugar, processed foods, to name just a few. But the list is scarily long.
Sauerkraut helps replenish good bacteria that may have been killed because it is loaded with probiotics. It is also high in vitamin K12, vitamin C, vitamin B6, folate, calcium, magnesium, and iron.
Regularly eating fermented foods helps brain function, digestion and absorption of food, it increases the availability of nutrients in the fermented dish, it assists you immune functions, and it can even help improve mood and behavior!
A few sauerkraut making tips
- You don’t need any fancy tools for fermenting. I’ve never used a proper fermentation weight in all my years of fermenting. My favorite thing to use is double bagged quart ziplocks filled with enough water to keep everything submerged. Then I set the lid on top and just barely screw it on so that it stays put but the ferment can still breathe. I’ve also used a ziplock bag of pebbles and rocks 😉 see, doesn’t have to be fancy!
- It is totally normal for the sauerkraut to change color slightly. As it ferments it goes from more of a brighter light green to a grayish green. So don’t worry when you see this.
- Temperature affects how long this needs to ferment. It is best to have it somewhere that is 68 degrees F or warmer. During the winter I let it ferment for 3 weeks, and during the summer I only have to do about 2 weeks.
- If any cabbage is above the liquid it will be exposed to oxygen and possibly mold, so that is why it is so important to keep it under the liquid with a weight.
- A food processor makes this process crazy simple and fast. But if you don’t have one you can just chop it as finely as possible.
- Live cultures can jump from one to the next. So if you are fermenting several different things (ie sauerkraut and sourdough), you have to keep them 6 feet apart to keep the cultures from spreading to each other.
- Its a good idea to start small! You will need to train your body to get used to sauerkraut or other fermented food. Start with a couple of tablespoons of only the liquid and work your way up to 1/2 cup of the actual sauerkraut per meal. I’ve been eating fermented foods since I was a little kid, but especially I’ve you’re an adult and have never had any, you’ll want to do this.
Get this easy sauerkraut recipe on YouTube!
Easy Sauerkraut Recipe
Ingredients:
- Sea salt, I like to use himalayan pink salt
- 5 heads of cabbage
Step one:
Pull off the outer leaves and set them aside. This is important to remember for later. Sometimes I forget and just start chopping away and then I’m always sad at the end when I don’t have me my cabbage leaves! Such a bummer.
I also like to weigh a few of the cabbages at this point so I can get an average of each cabbage and a total weight of all 5 of them. This will also be important later for figuring out how much salt to add.
Step two:
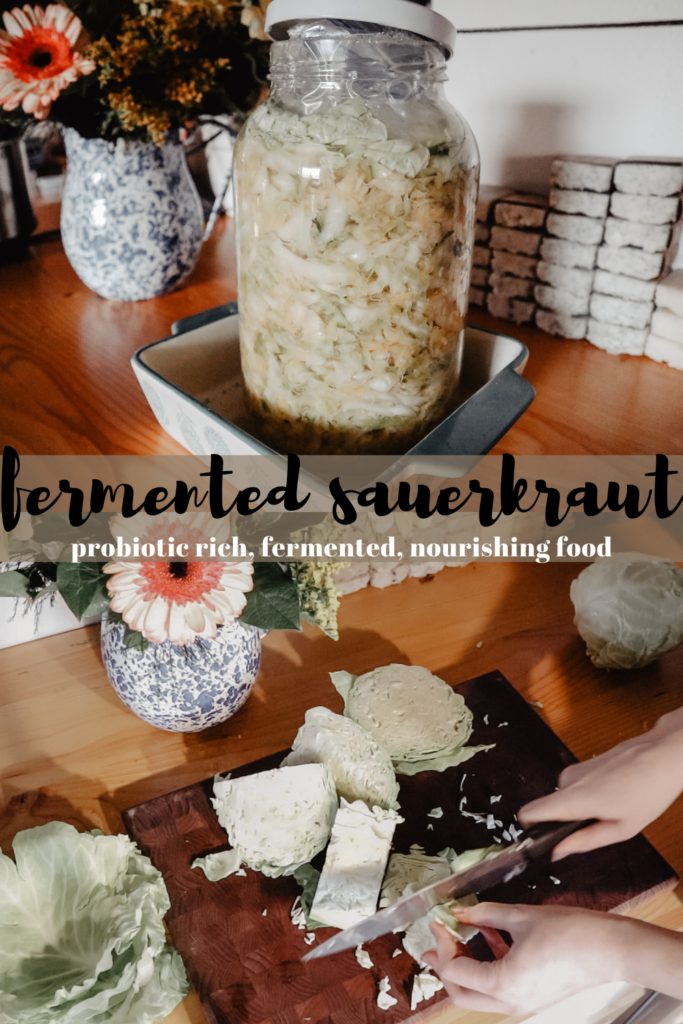
Shred or chop all the cabbage. For the longest time I had always just chopped the cabbage up with a good kitchen knife, but recently I’ve changed up my method. And man does it save me a lot of time, and my wrist a lot of work!
A couple months ago, for my 22nd birthday, my dad got me a food processor! Which has been so time-saving! Like why didn’t I just buy one years ago?!
So I’ve been using the grating side of the blade to shred all the cabbage! It definitely makes it finer, but we’ve actually been liking it that way even more. But whatever way you want to do it, just add it to a big bowl (or stockpot) as you chop it up. We want it in something extra large so it is super easy to stir and mix up.
Step three:
Now it’s time to add the salt and start working it in. Taking the total weight of the cabbages you chopped up you now can measure out the salt. I like to use Himalayan pink salt for this personally because it is so high in healthy minerals, you just don’t want to use iodized table salt.
You want to use 1 tablespoon of salt for every 1 3/4lb of cabbage. So calculate it, measure it out, and sprinkle it over all the cabbage.
I mix it all up, but I like to actually let it sit on the cabbage for awhile before I start really smashing it. Letting the salt sit on there draws some moisture out and that therefore means less work for my poor forearms.
Oh who am I kidding, Luke usually does the smashing part, because my forearms cramp so easily.
So there ya go, now you know. I save that part for my sweet sweet husband.
But I still do let the salt sit on there to make it easier for him too 😉
And then you start working it all together with your hands until it starts to get juicy. You might have to massage and smash it for several minutes to get enough liquid. But that juice that is created by working it together is the brine. You will want enough of it so that when you pack all the cabbage into a jar the brine will cover it.
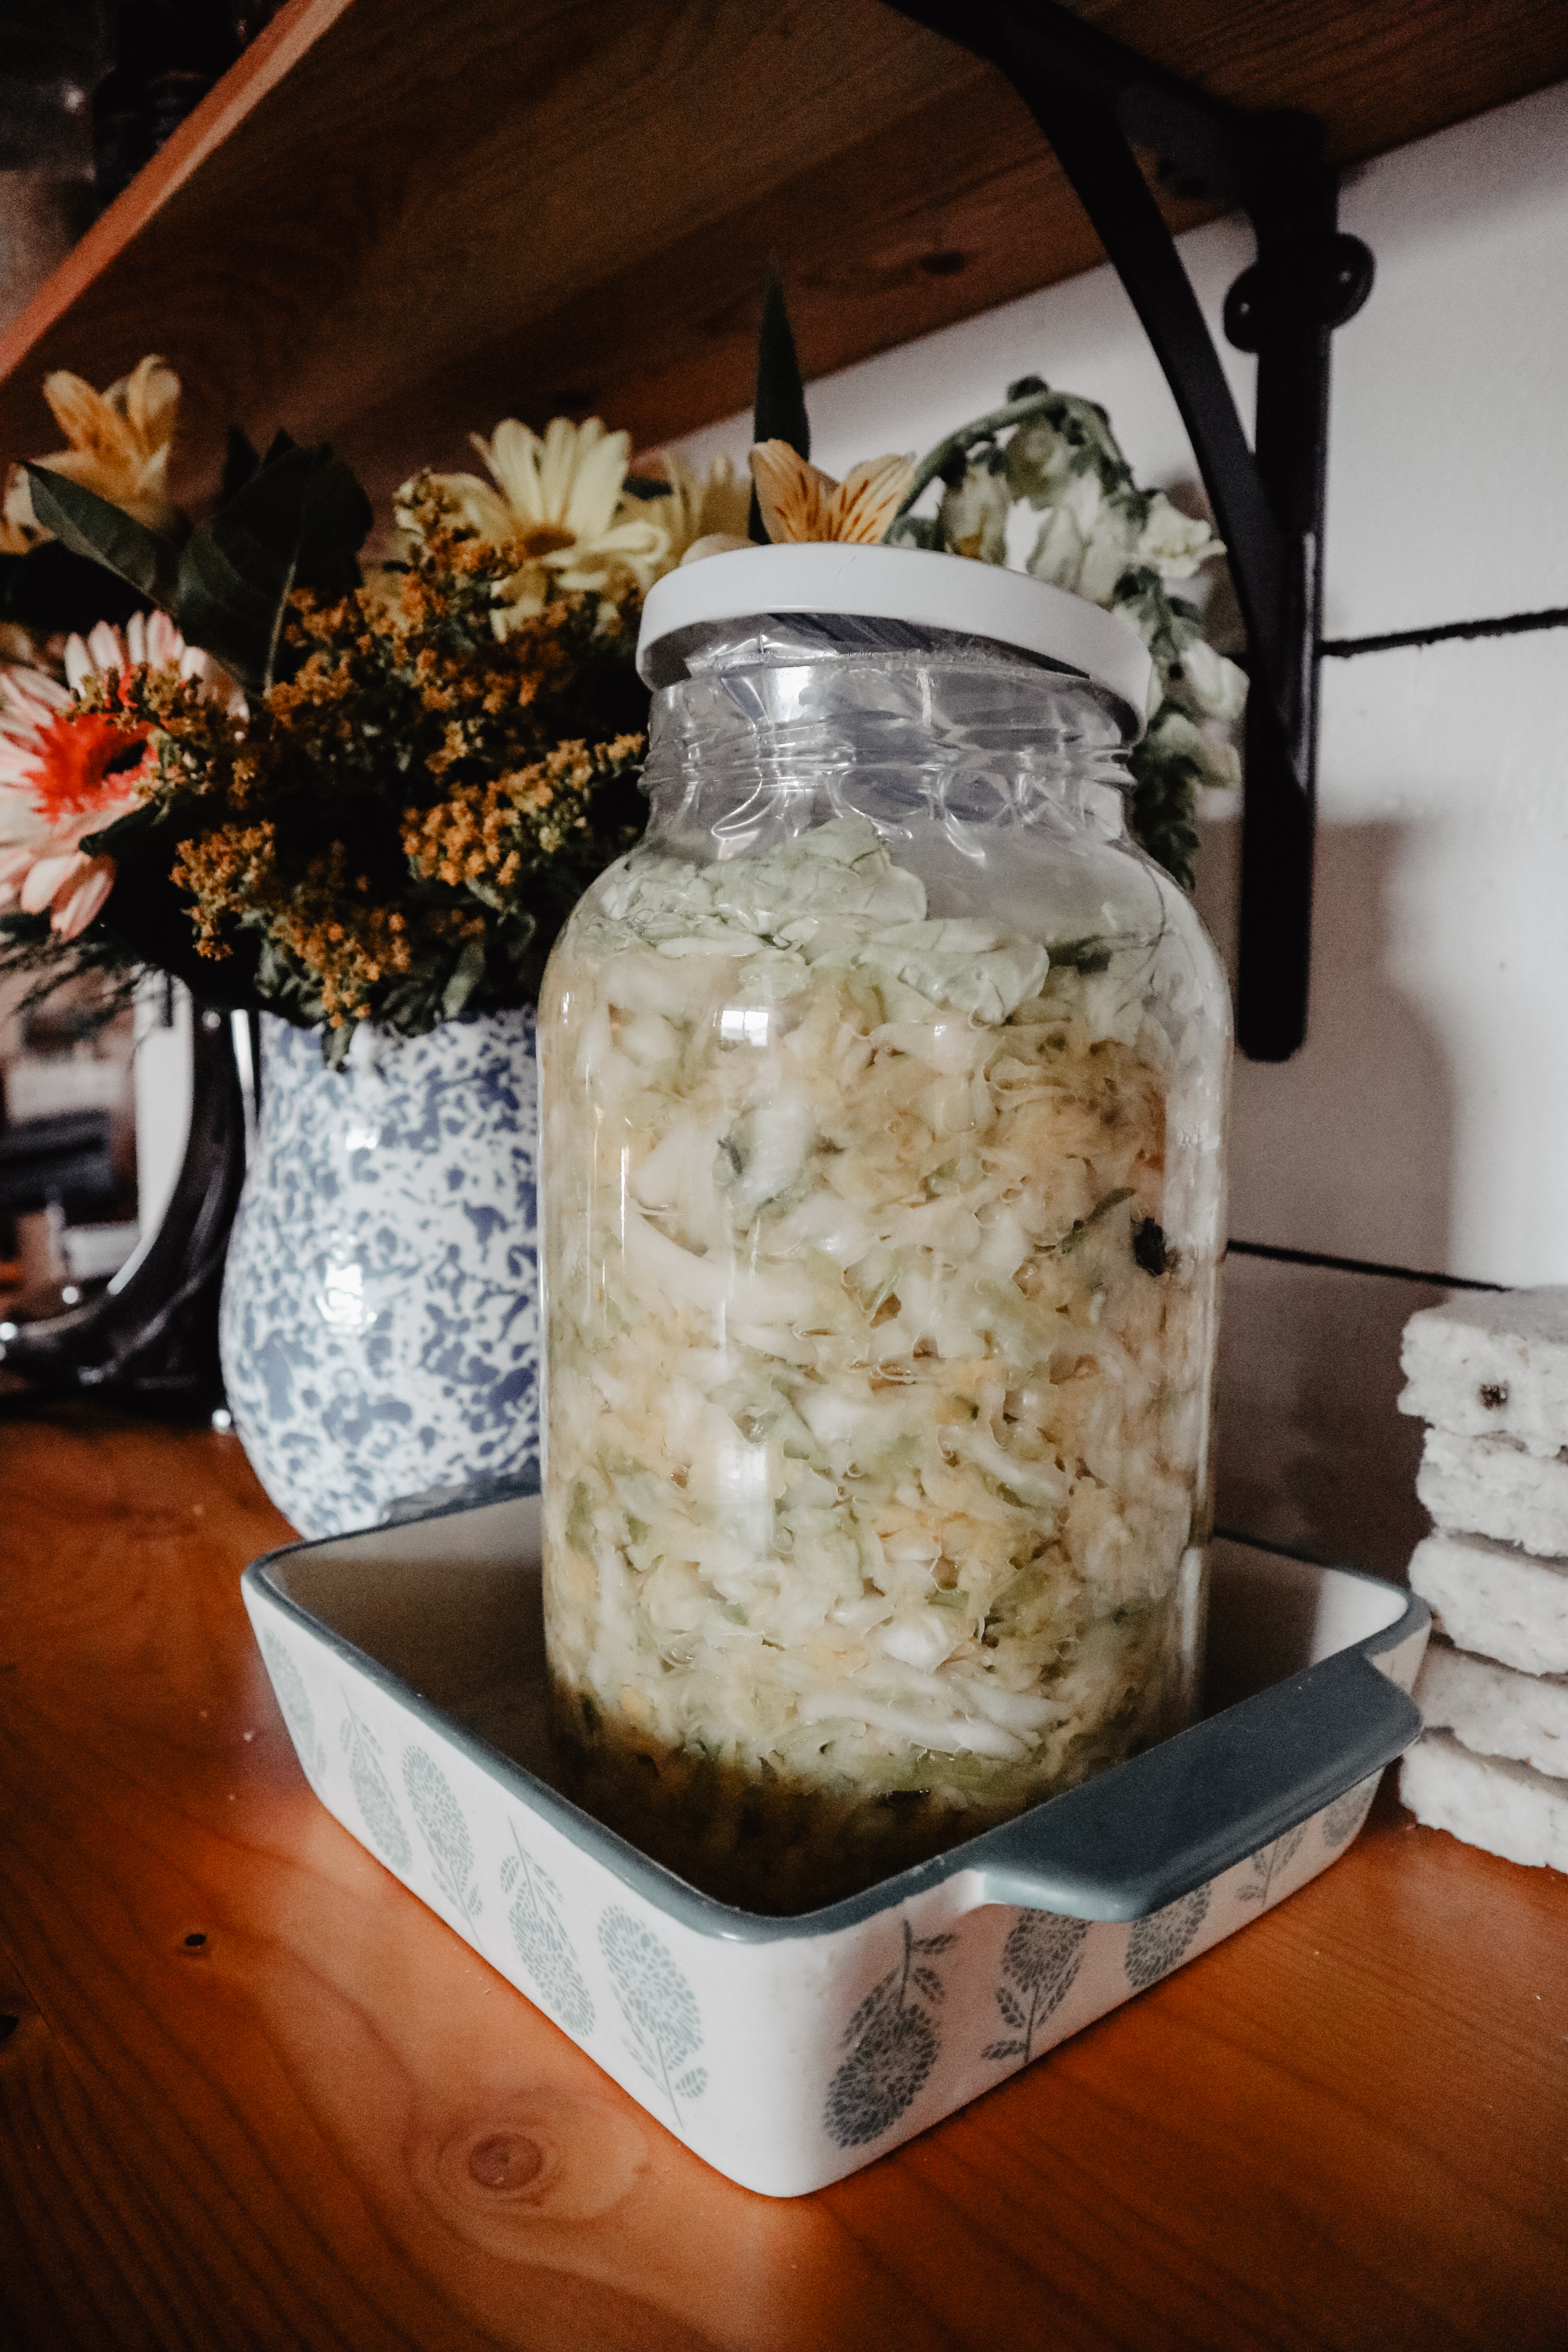
Step four: put it in a jar
Now you can pack it all into a clean jar. I normally use a big glass gallon jar, but half gallons are fine. Or a fermenting crock would be even better, but I ain’t got one. Push it all down with your fist until the cabbage is below the brine level.
Step five:
And now y’all, we get to use those outer cabbage leaves we saved from earlier! Finally!
You layer those over the top of the cabbage in the jar, and push them down firmly so they hold the cabbage under the level of the brine.
You just use some sort of a weight to actually keep the leaves held down. A lot of people use actual, proper fermentation weights. Ya know, weights that are actually meant for this purpose.
But you know me, I don’t like to be proper.
So normally I will just double bag two quart ziplock bags and set them inside the top of the jar. Then I slowly pour water into the bag until the level comes to the top of the jar. Then I seal both bags carefully (we don’t want water leaking into our ferment!). This water weight has worked well for me every single time. I also have double bagged some small rocks or pebbles and used those as a weight as well. And place the lid on top of that. Just don’t screw the lid on all the way because the cabbage can expand as it ferments and we don’t want to be dealing with an explosion situation. I just set it on and barely turn it so it stays put.
But this part is important, because if any of the cabbage is above the brine level and exposed to oxygen, it could mold really easily and possibly ruin your whole ferment. This has literally only happened to me once, so it’s really easy to avoid, but just keep it in mind.
Step six: let it ferment
Here is the easiest step of all!
Just let it sit on your countertop and ferment anywhere from 7 days to 3 weeks. I typically let mine go for 2 weeks because I’ve read that 2 week or after is most idea for probiotic benefit. It will just get more strong and sour as it goes longer, but also have more probiotics.
Once it’s gone the amount of time you’ve chosen, you can remove the weight and cabbage leaves, screw on the lid, and place it in the refrigerator.
See how easy that was?!
This will store in your refrigerator for months now, so you don’t have to worry about eating it up too fast. But we definitely like to have a decently sized helping with each meal!
Now you can go and make this easy sauerkraut recipe as well!
And blessings.
Pin it for later!
Print the recipe for later!
Easy Sauerkraut Recipe
Ingredients
- Sea salt I like to use himalayan pink salt
- 5 heads cabbage
Instructions
- Pull off the outer leaves and set them aside.
- Weigh the cabbages and get a total. We will need this for later.
- Shred or chop all the cabbage. I like to use the food processor with the grating blade.
- Add the salt! You want to use 1 tablespoon of salt for every 1 3/4lb of cabbage. So calculate it, measure it out, and sprinkle it over all the cabbage.
- Mix it all up, but I like to actually let it sit on the cabbage for awhile before I start really smashing it. Letting the salt sit on there draws some moisture out and makes it faster to get enough brine.
- Then start massaging and smashing it, until you get enough of the liquid (brine) that it will cover all the cabbage in your jar.
- Pack it all in the jar and smash it down with your fist every couple handfuls.
- Take the cabbage leaves we set aside and lay them on top of the cabbage to help hold it under the brine.
- Put a weight on top. You can use a fermentation weight, or if you don't have one, double bagged ziplocks with either water or rocks, just make sure they are sealed well. And set the lid on top of that, but don't seal it.
- Let it sit on your countertop and ferment anywhere from 7 days to 3 weeks.
- Once it's gone the amount of time you've chosen, you can remove the weight and cabbage leaves, screw on the lid, and place it in the refrigerator. We like to eat a good helping with each meal!
Easy sauerkraut recipe
Ugh sauerkraut, why haven’t I tackled you yet!!! I need to do it! You make it look so easy and pretty!