Simple Homemade Ghee Recipe
This post may contain affiliate links. Read my disclosure policy here.
Jump to RecipeLet’s make some ghee y’all!
What Is Ghee?
This is an amazing thing to have on hand if you have a slight dairy sensitivity, because this process removes most of the casein and whey proteins. That leaves behind just the fat that is 99% to 100% pure.
It is basically butter oil!
So delicious!
It is a staple of Indian cuisine. A specially prepared clarified butter is traditionally made by slowly simmering butter until the water evaporates and the milk solids gently brown, and then are removed. The butter clarification process yields a richly flavored butter oil with nutty and toffee flavors.
Health Benefits
Also, ghee has some amazing health benefits! Not only are good fats like this so great for your body, but this is full of vitamins A,D,K and E!
How cool!

It Has A High Smoking Point
Ya know how butter tends to burn pretty easily?
Especially for me, because I get easily distracted.
That is because all the milk solids in the butter burn quickly. Those are what we are removing in the process of making ghee.
That means that the smoke point of butter goes from only about 350 F to more than 450 F!
So ghee is an excellent oil to use for frying! Along with lard and tallow, this is one of my favorites!
And you won’t smoke out your family in the process 😉
Bonus!
More Affordable To DIY
We love the GAPS diet! My husband went on it for around 6 months and it totally cleared up the allergy problems he was having. Which is awesome! That also means that I’ve had the opportunity to learn how to make some of the more specialized foods that you’re able to eat on this diet. Like ghee.
Purchasing ghee, pre-made, from the store can become very expensive. It costs a lot more than butter! So since this is such a simple process, it makes total sense to just buy butter and turn it into ghee yourself!
Watch my recipe video on YouTube:
Simple Homemade Ghee Recipe
Ingredients:
- Butter, preferably grass-fed
Supplies:
- A heavy bottomed pot
- A large spoon
- A bowl to catch what you skim off the top
- Cheesecloth
- A mason jar for storage
Use a heavy-bottomed pan, dutch oven, or stainless steel skillet so that the milk solids do not rapidly burn. It’s best to cut the butter into smaller pieces so it melts evenly and the solids brown consistently. Apply medium heat to melt the butter, then reduce to medium-low to simmer.
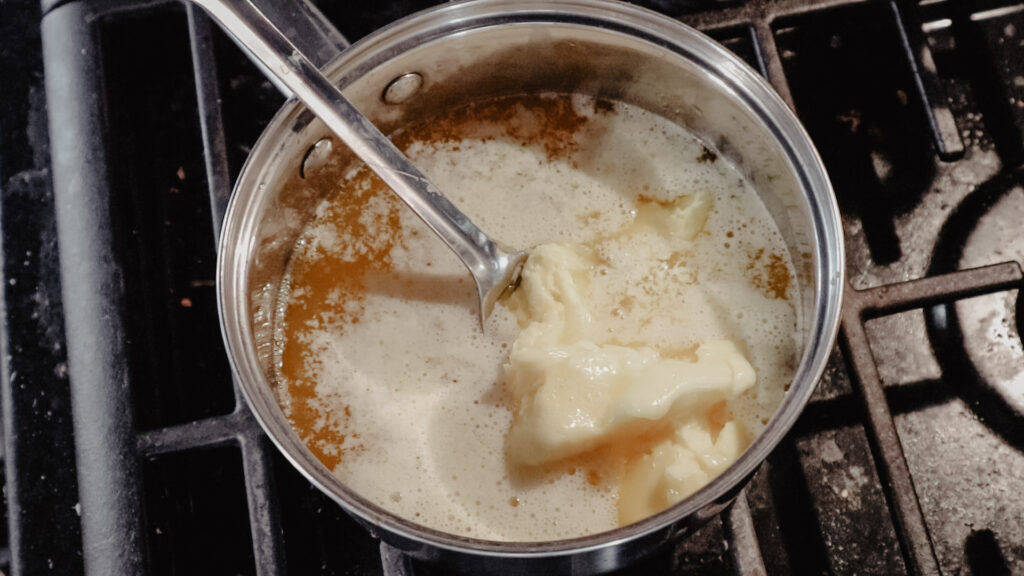
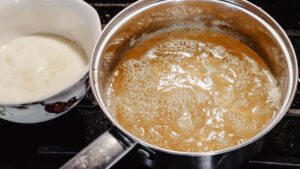
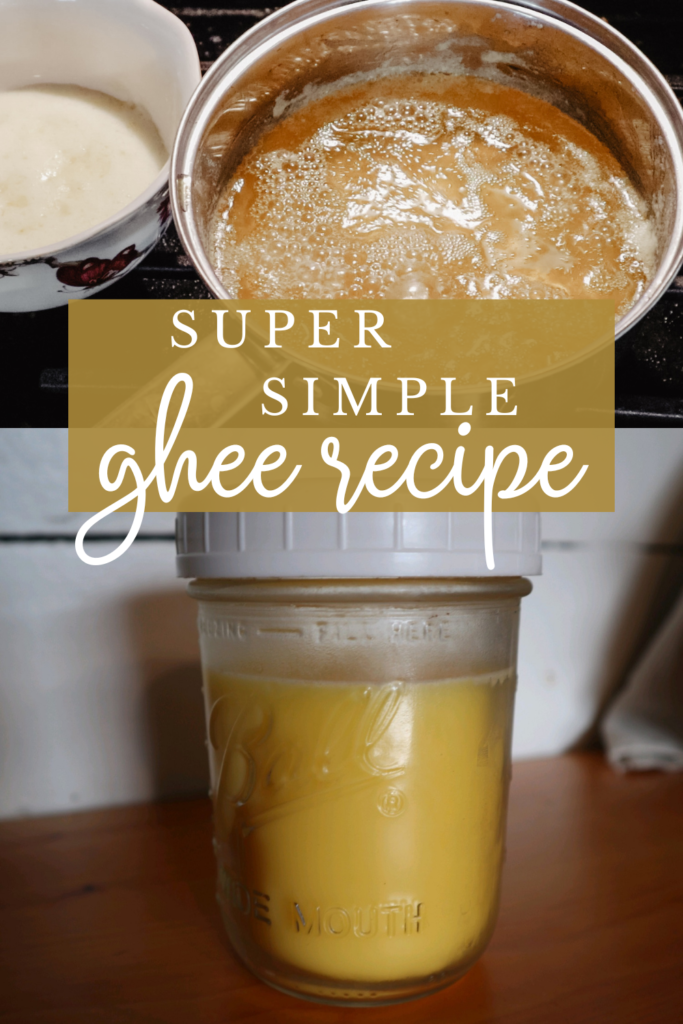
Once the butter has completely melted, it will bubble and begin to separate into three layers. As the butter simmers, some of the milk proteins rise and sit on the surface as it separates from the fat and water. That will look white and foamy. The next layer is the yellow-clear liquid in the middle. The last layer is the white lactose sitting on the bottom of the pot.
Use a spoon to skim the white solids on the surface and discard. I just have a bowl sitting there that I dump it into and then later I take it out to the chickens.
They love it!
This process takes time for the butter oil to turn clear, so make sure you keep an eye on it and continually remove the solids. If you loose track of it you might miss some of it and it won’t be as digestible for someone with a dairy sensitivity.
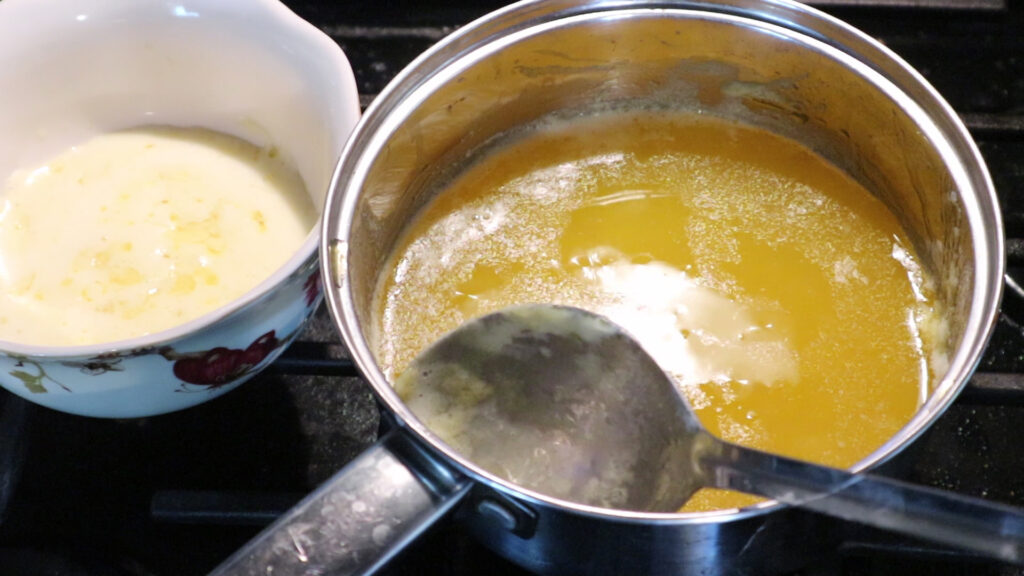
At this point clarified butter is made. You now should have a clear yellowish liquid and if you look through that you should see a layer of white “sludge” on the bottom.
Yes, that’s the best name I could think of.
Don’t judge.
The remaining steps will give ghee a toasted nutty flavor, which is heavenly!
Continue to simmer the butter over medium-low heat. Make sure not to take your eyes off the butter for too long.
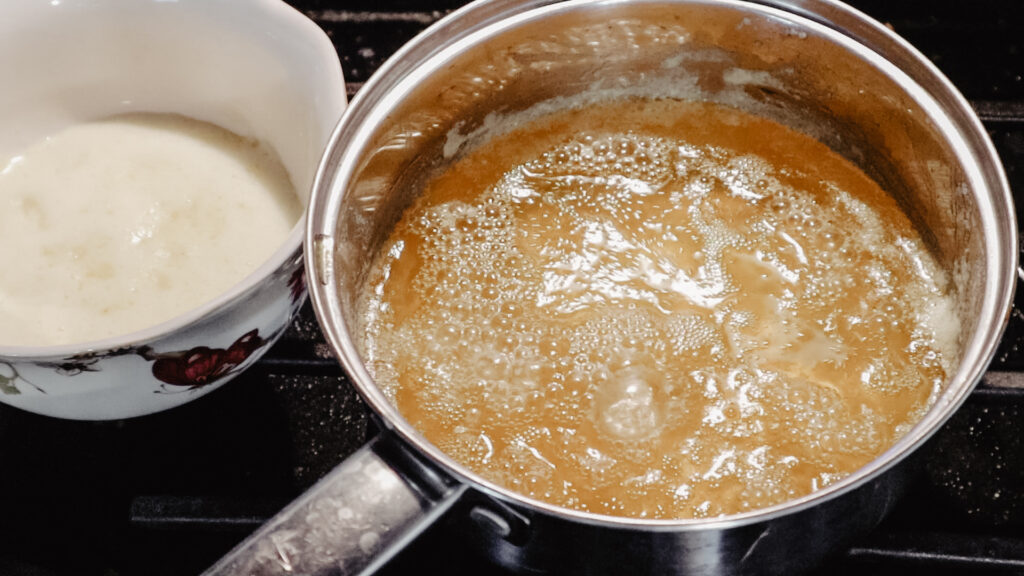
It will quickly begin to change a more golden color with amber brown solids formed at the bottom of the pan. When you see this change and smell toffee flavors, it’s time to turn off the heat and remove the pan from the stove.
Now there are several stages you can stop it at, depending on how much of a nutty flavor you like. Obviously lighter brown on the bottom will be only slightly nutty in flavor, and the more you brown it, the stronger the flavor. Just depends on your preference.
I personally like it a bit stronger, it is just lovely!
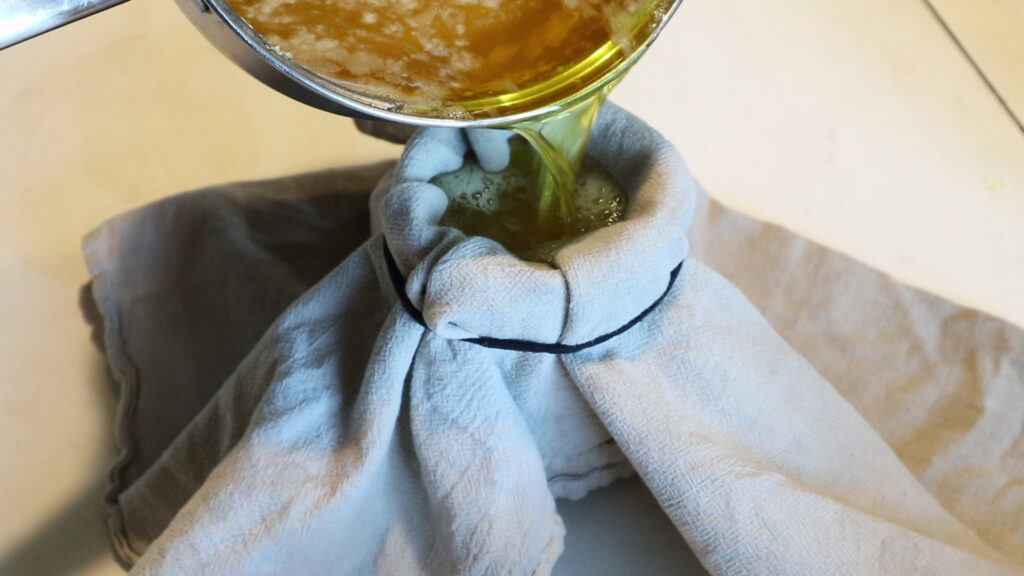
Strain It
Now you just take a cheesecloth and double it up, then put it over a glass mason jar, push it in a little and secure it with a band. I just used a hair tie, because I always have one on hand.
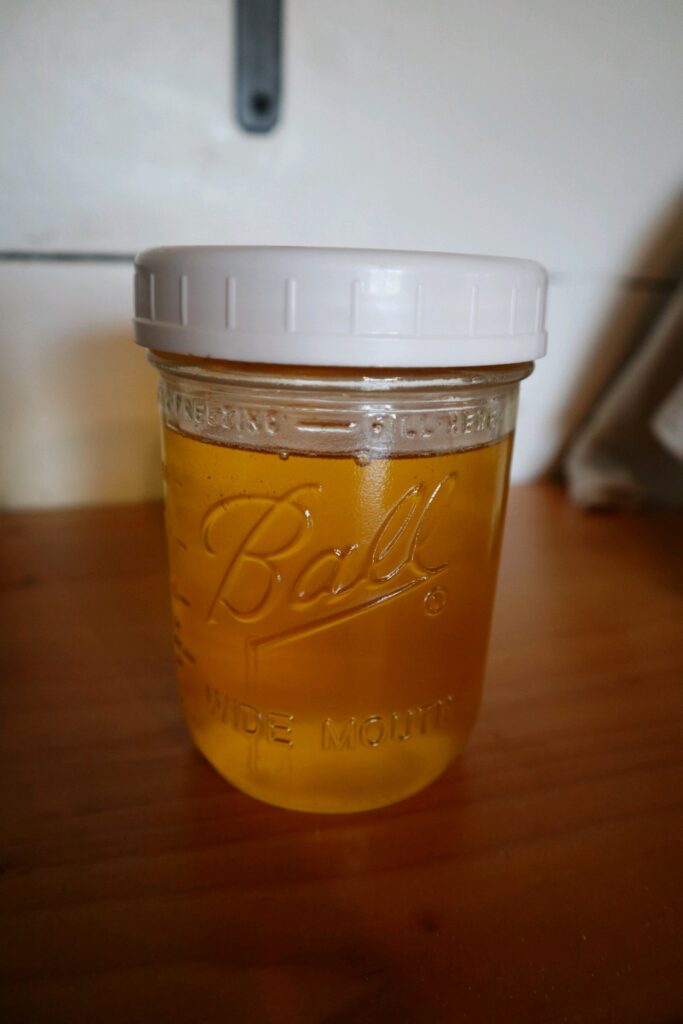
Then pour the ghee through the cloth, and into the jar. The cheesecloth will catch all the little bits of browned lactose, and you will be left with beautiful clear ghee!
Here is what it looks like after being strained:
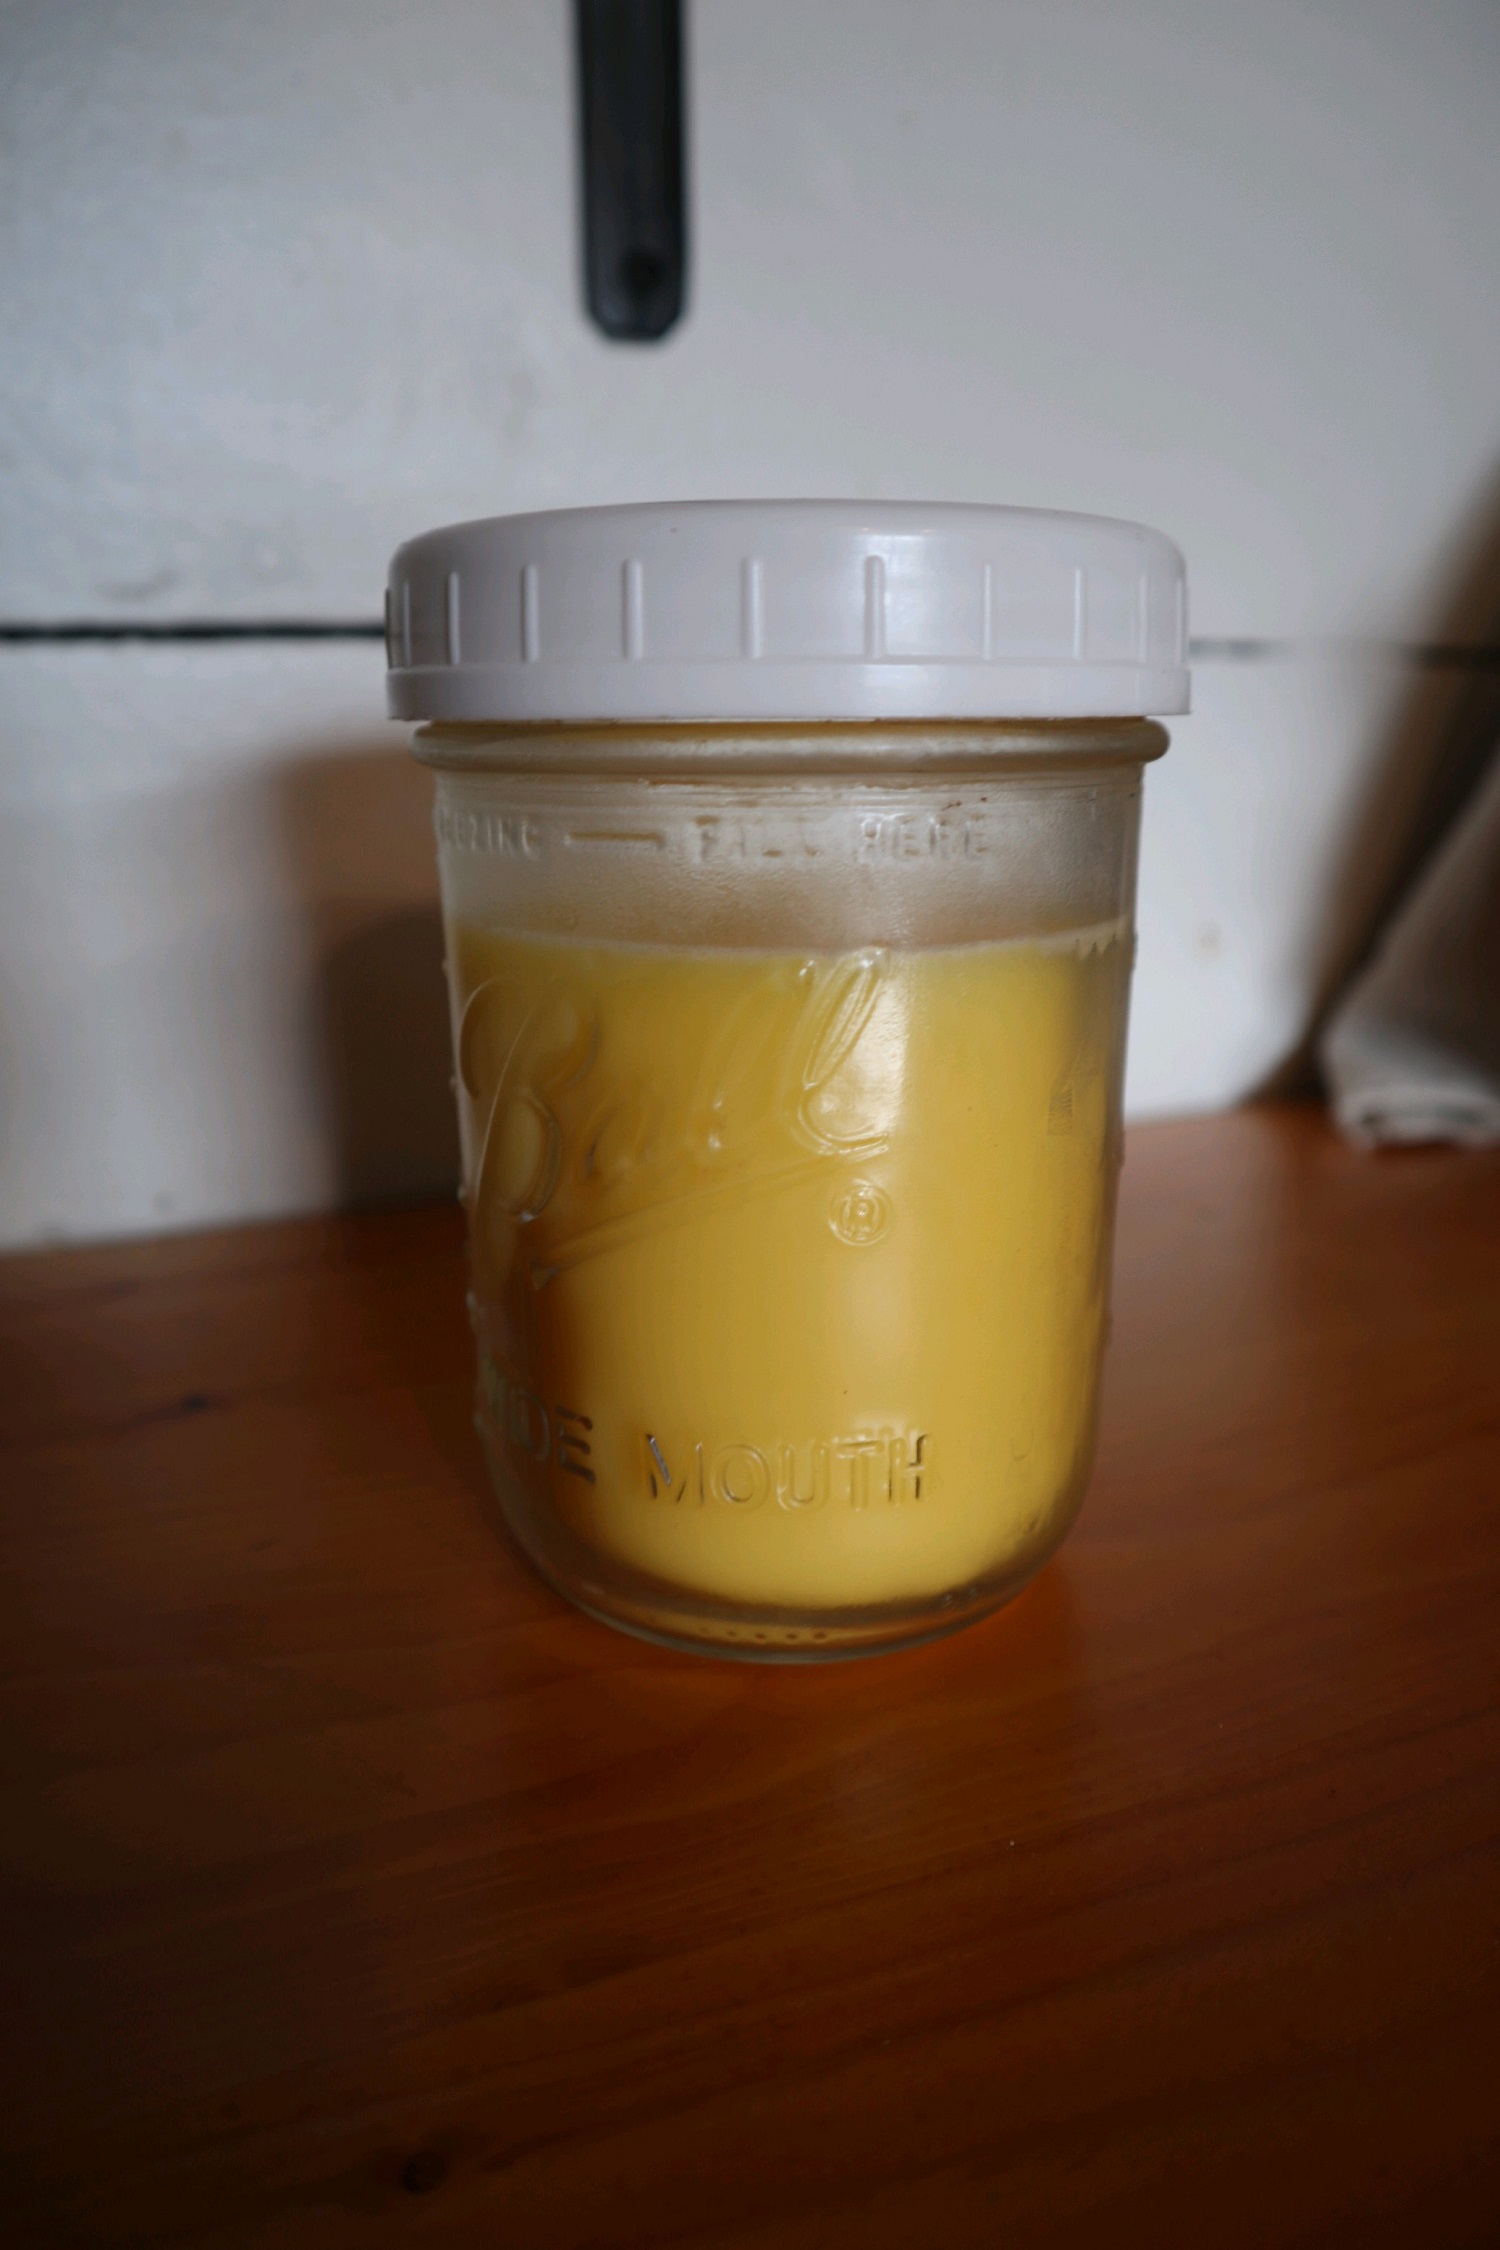
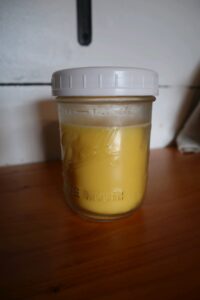
Then as it cools it solidifies and becomes a creamy yellow color:
And there ya go!
Its ready to use in all your baking and frying!
Because we removed all the casein and whey and stuff, this is a lot more shelf stable. So you don’t even need to store it in the refrigerator in between using it!
I just store it in a glass mason jar with an air tight lid, and its good to go!
I hope you enjoyed this simple homemade ghee recipe!
And blessings!
Listen on your favorite podcast app
Ghee Recipe
Ingredients
- 1 lb grass fed butter
Instructions
- Put the butter in a pot and turn on medium heat to melt the butter, then reduce to medium-low to simmer.

- As it heats up it'll form foam on the top that you can start to skim off, just keep an eye on it as it simmers and keep taking the foam off the top.
- It will stop producing foam and quickly begin to change a more golden color with amber brown solids formed at the bottom of the pan. When you see this change and smell toffee flavors, it’s time to turn off the heat and remove the pan from the stove.
- Now there are several stages you can stop it at, depending on how much of a nutty flavor you like. Obviously lighter brown on the bottom will be only slightly nutty in flavor, and the more you brown it, the stronger the flavor. Just depends on your preference.
- Strain it through a cheesecloth.

- Store in a glass mason jar.
Pin It For Later!
so how much ghee do you get out of a pound of butter?