How to can water! My recipe and instructions for canning water and why you should preserve some to have on hand for emergencies!
This post may contain affiliate links. Read my disclosure policy here.
Jump to RecipeHmmm
I do a lot of weird things.
Have you all noticed?
I ferment stuff on the counter, I boil chicken feet in my soup, I cure meat in my fridge.
That all may seem weird to y’all, but to me, it’s our way of life.
This may also fall under the category “weird”. And that is canning water.
Why you should consider water storage
Water is one of the most important things to have saved for emergencies. Arguably more important than food because you can go much longer without food than water.
This is so clearly seen during any natural disaster or emergency, when all the water bottles are sold out and the shelves are empty. No one really seems to plan ahead, but if they do its usually geared towards food or supplies. Water is a lot of times forgotten about in the planning.
But considering you’ll only last around 3 days with no water, it needs to be of top concern.
Consider your resources first
Now, before you go canning gallons of water, think about what natural resources you have available to you. When we lived in our last house in town I made sure to can plenty of water to have on hand. But that was because we were on city water that could be turned off in an emergency. We don’t like being dependent on that for something so essential as water.
But now that we have moved to our 10 acre homestead I stopped canning water. Or at least I don’t can as much as I used to. I have some canned and ready just for convenience sake. But the situation here is vastly different then when we lived in town.
Our water level is only 15 feet down at the DRYEST time of year. We have one corner of the property that floods during the spring and summer and the water level is literally above the ground level there. So in an emergency we could tote buckets of water from the old well or our pond and bring it in the house to use. Even in the winter we could break the ice on top. The ice doesn’t get so thick here that we wouldn’t be able to access the water underneath.
I still wouldn’t trust the quality though, so that’s why we have a Berkey water filter.
But we have friends who live not too far away that had to drill down 300 feet to hit water. In that case, if your power was out and you didn’t have a generator, then there would be no way to get water from that well.
So you need to consider: do you have natural resources of water on your property? And do you have a way to filter it?
If you have answered both of those questions with a “yes!”, then you may not need to can any water for storage.
If you have answered no to either of those, then you should consider preserving and storing water.

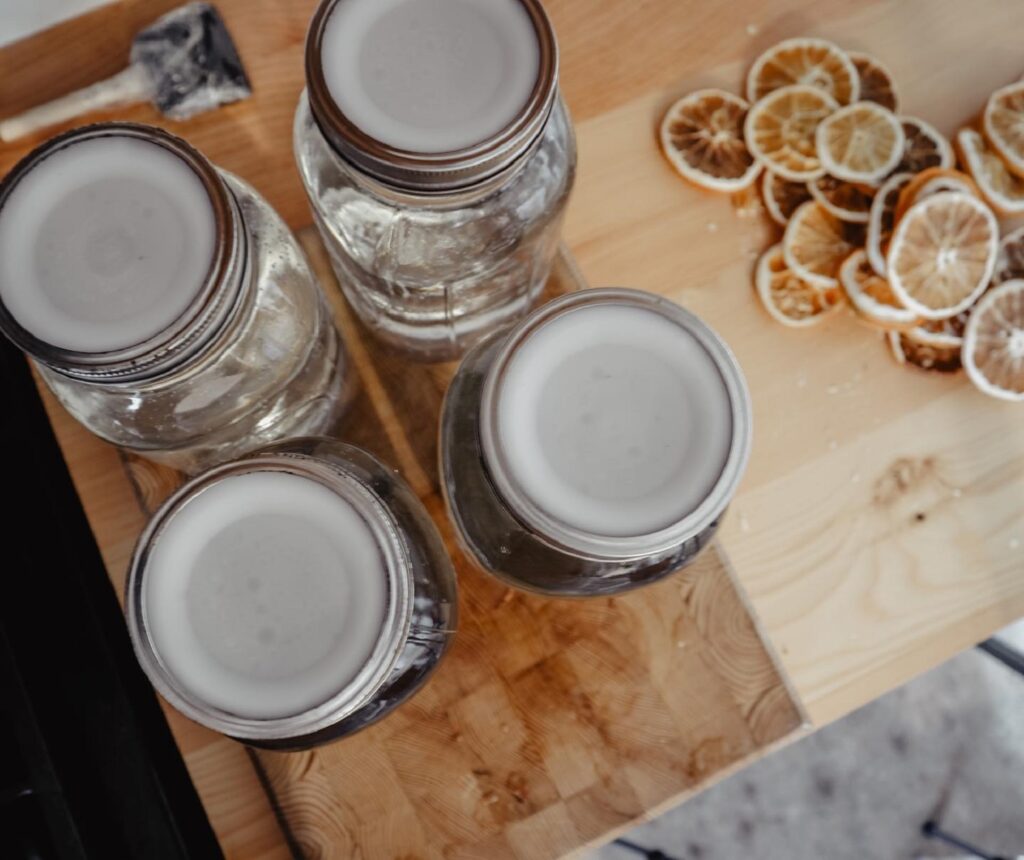
How To Can Water
This is an incredibly easy process. Here’s what you’ll need:
- A canner
- Pint, quart or half gallon jars
- Lids and rims (either Tattler lids like I use, or the regular disposable metal lids)
- Funnel
- Ladle
Canners usually hold 7 quart jars or 4 half gallon jars. I like to use half gallons, so I take that amount of water (2 gallons total) and pour it in a pot. Bring to a rolling boil, and hold for 10 minutes to kill any bacteria.
Get your canner ready. This is water bath canning so you need to make sure you have enough water that it’ll cover the jars by at least an inch. I also like to add a splash of white vinegar so that the outside of the jars doesn’t get those stubborn hard water deposits. Set the canner on the stovetop and start it heating. You want it about to the temperature that your jars of hot water will be when you put them in (to avoid the jars cracking).
I use the Tattler reusable lids, so at this point I take all those and put them in a small pot of water and bring them to a boil. I find they seal better when they’ve been heated that thoroughly.
Ladle the water slowly into your jars using your funnel so you don’t make a big mess. Leave 1/2 inch headspace.
Adjust your lids and rims. I just barely hand-tighten Tattler lids, but you can tighten the regular metal Ball lids more.
Process pints, quarts and half gallons for 20 minutes. Remember, you don’t start the timer until the canner comes to a rolling boil.
Once the timer goes off, you can take the lid off the canner. When you use Tattler lids you allow the canner to cool for 5 minutes, then you take out all the jars and tighten down the lids as hard as you can with some potholders. If you are using regular metal lids, you can just leave them to cool off in the canner for several hours, even until the next day.
Once everything is cooled, you can take the rims off and check for your seal.
Store the sealed ones in your food or emergency storage area.
A few tips:
- I personally like to can it in half gallon jars. Then I can preserve a large amount without using the quart jars that I like to save for food canning. But you can use pints, quarts or half gallons.
- Even though this is a water bath canning recipe, I like to use my pressure canner. I just don’t tighten the lid down so it won’t start collecting pressure. That way I can just have one canner for two different functions. Saves space!
- You can store the water indefinitely, but to be safe, I would probably replace the water, clean the jars, and re-can it every 3ish years.
Now you are one step closer to being prepared for an emergency or temporary power outage.
And blessings!
Pin it for later!
Print the recipe out:
How to can water
Equipment
- Water
- Canner
- Canning jars pint, quart, or half gallon size
- Canning lids & rims
- Ladle
- Funnel
Instructions
- Wash your jars
- Using a stockpot, fill with the amount of water you are planning to can. Set on stove and bring to a boil. Boil for 10 minutes.
- Prepare your canner. Fill with enough water that it will cover the jars by 1 inch. Set on stove and heat up.
- Wash the lids and put them in a pot with water, put it on the stovetop and heat up. Heating the lids seems to help them seal better.
- Ladle hot water into jars slowly, leaving 1/2" headspace.
- Adjust lids and rims.
- Lower into the canner, set the lid on top, and bring to a boil.
- Process pints, quarts, and half gallon for 20 minutes.
- Once the timer goes off, take the lid off the canner and allow it to cool.
I think that canning water for an emergency is a great idea. Whenever I am canning food and have an empty space in the canner, I use that spot for water.
I was told that you have to add 1-2 drops of liquid chlorine to preserve the water or bacteria will build up even if canned. What is your opinion. Thank you.