Raw Milk Kefir Recipe
This post may contain affiliate links. Read my disclosure policy here.
Jump to RecipeWe can’t get enough of fermented foods around here, y’all.
I am a little obsessed.
I go pick up produce from a local farmer, and I think, hmm…how could I ferment this thing?
At any time you will find somewhere between 1 and 10 different jars of fermenting goodness on my counter.
It’s just so good.
And so good for your gut health, man!
I’ve made water kefir in the past, but I always come back to the good ol’ milk kefir.
Watch this on YouTube!
Benefits of fermented foods
Kefir is a specific type of mesophilic symbiotic culture.
This is a fabulous component of the GAPS diet at a certain stage, that I am always excited to add it in while on the intro diet. But wherever you are on your health journey, this is an excellent probiotic to add to your diet.
Probiotic foods help rebuild and maintain your health and it helps your gut process sugars easier.
In fact, I actually always try to take some fermented food or drink after I eat something that isn’t super healthy if we are having dinner at someone’s house. And I can actually tell a difference in how I feel!
So many things in our modern life destroy the gut lining and the living organisms that inhabit a healthy digestive tract, otherwise known as our gut flora. Especially antibiotics (which are becoming more and more widely used), kill the healthy gut flora.
You would be shocked out of your socks if you knew how many health problems (including cancer), can be contributed to by having an unhealthy gut. With the typical american diet of non-organic meat, processed/refined sugars, and genetically modified grains, it isn’t surprising that so many people have health issues. So many of them can be traced back to an unhealthy gut flora.
This means it is vitally (vitally I tell ya!) important to bring back all these fermented foods, that are packed full of beneficial bacteria, that used to be such a big part of diets before all the industrializing of the food system.
So here we go, you need some fermented food in you life.
Because I said.
So today I’m gonna teach ya to make kefir.
Listen to this on your favorite podcast app!
It’s ridiculously easy
Not only is this a really healthy food to add into your diet, but it is also one of the easiest ferments to start with.
So if you are just jumping into this fermenting journey, this is a fabulous one to start with.
It is almost impossible to screw up.
And believe me, I would know.
This doesn’t grow mold like some other ferments can do. The only thing that might happen is it gets too sour and intense to drink and you’ll just have to compost it and try again.
But don’t worry, kefir is very forgiving, so even if that happens it’s not gonna kill the grains.
Raw Milk Kefir Recipe
What you’ll need:
- healthy + active kefir grains (or a dehydrated pack like THIS ONE)
- 1 quart of raw milk
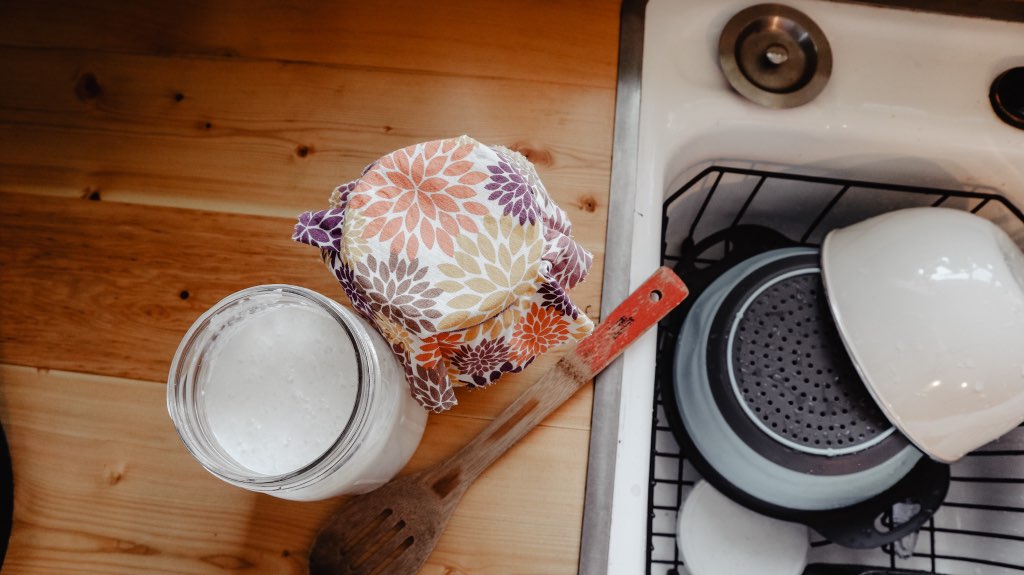
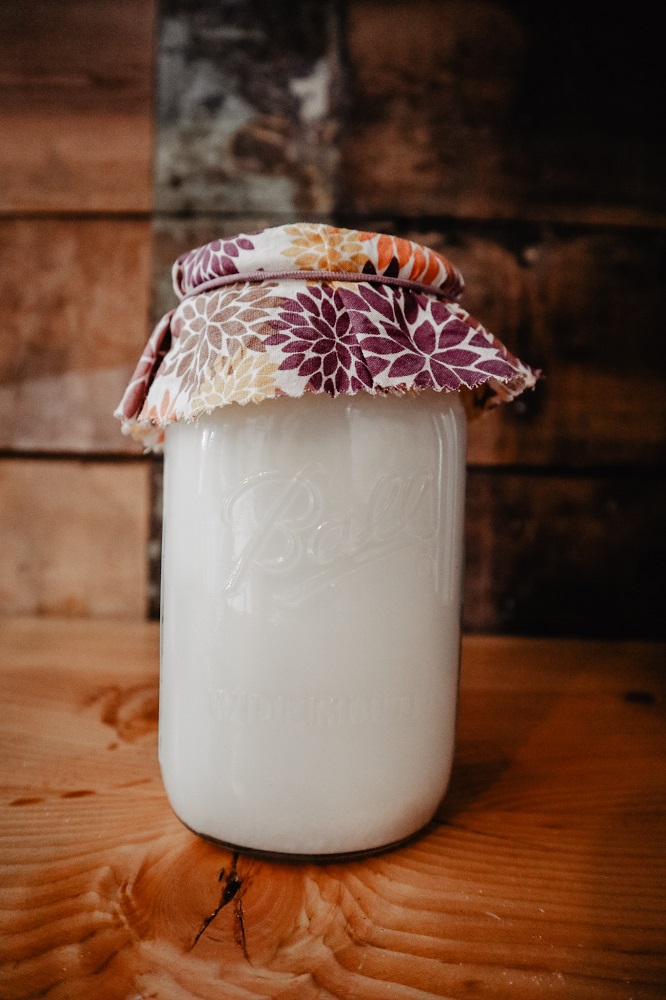
- 1 quart mason jar
- cheesecloth or other breathable fabric
- mason jar ring or rubber band
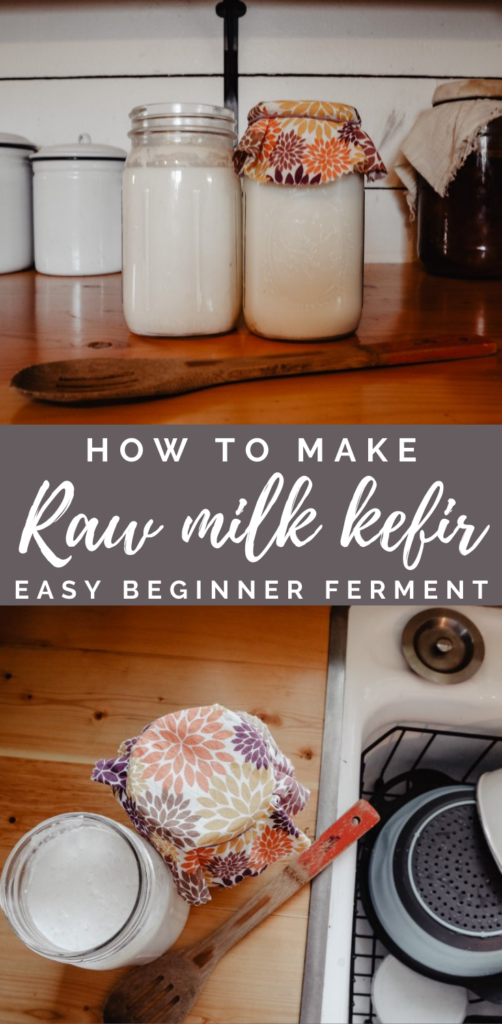
Step one: Put around 2 tsp of kefir grains in a quart jar. I honestly don’t follow the kefir grain amount very closely. I basically just put whatever I have in there from the last batch and then when someone purchases some on my shop, I take that amount out. And then I have a little less in my personal grains.
It’ll just ferment faster with more grains, and you can have as little as 1/2 tsp. You just have to vary the amount of time it sits.
But kefir grains reproduce, so they will continue to grow more and you can give them to friends (or eat them if you’re weird like me, and like little sour probiotic gummy type things).
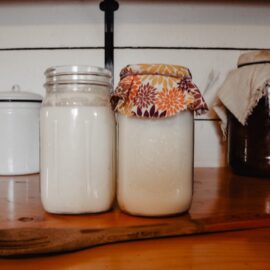
Step two: Once the grains are in your jar, pour your raw milk over them until 2 inches below the top. Kinda where the jar starts to curve. The kefir can expand sometimes during fermentation, so you just wanna make sure that it isn’t up to the brim and gonna spill out if it grows.
Step three: Cover the jar with some cheesecloth or other breathable fabric (or even a loose jar lid). Secure the cloth down with a rubber band, hair tie, or a mason jar rim.
We want the kefir to be able to breathe, and get enough oxygen, but not get any bugs or dirt in it.
Step four: Let the jar sit out on the counter until it has reached the sourness and thickness that you like.
This totally just depends of what ya like.
You can do only a 12 hour ferment and it won’t be as intense (which might be good for someone just getting used to the taste). I personally leave it out for more like 36 hours most of the time.
Because I love all them probiotic benefits when it’s more thick and sour.
Ah yeah!
Step five: Once it has fermented as long as you’d like it to, we are going to strain out the kefir grains.
So we can hurry up and drink this fabulous beverage.
I use a plastic strainer and spatula for this (you can also use a wooden spoon). I try not to ever use metal on my kefir grains, only plastic or wood. Kefir grains are acidic in nature and so when they come in contact with reactive metals they can react badly.
Just something to keep in mind.
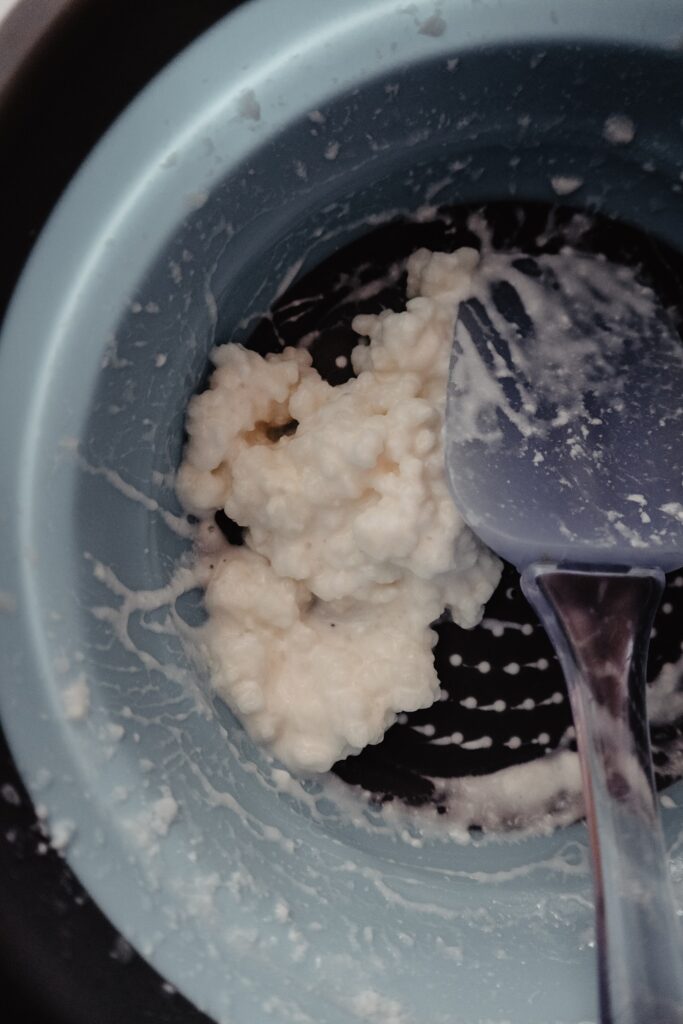
I just keep pushing the spatula along the bottom of the strainer as I stir it. So that it slowly pushes the thick kefir through the holes.
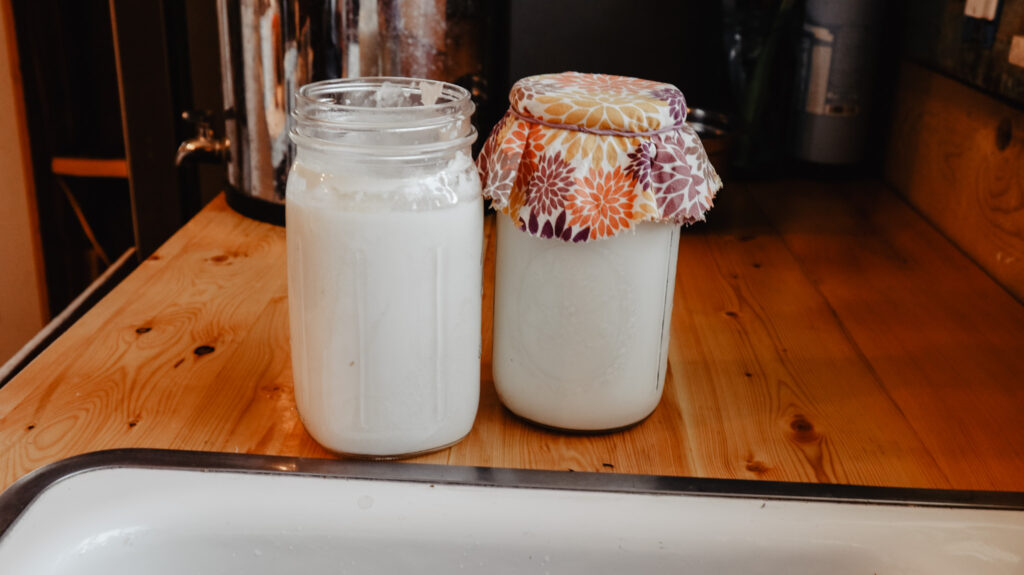
Pour the fermented kefir back into the jar it was in. Put the kefir grains into a new jar and repeat the process. You can either leave it out on the counter for another batch or store it in the fridge in a jar covered in milk.
Now you can enjoy the fermented kefir!
How to use kefir
There are several ways to drink the kefir. My personal favorite is to just drink it straight.
It is one of my regular breakfasts.
A quart of kefir. So easy. So deliciously sour and healthy.
Also add some raw honey or maple syrup if it is too sour for you.
You can also make it into a smoothie. Add some frozen fruit and honey or maple syrup. So yummy! This way would probably be easiest for people just getting used to the taste.
Use it with granola. Ya know how delicious it is to have a bowl of yogurt with granola over top? Well, you can do the same thing with this kefir!
Raw milk kefir FAQs
How long do the grains live?
Forever.
We have been able to keep kefir grains going for years and years. As long as they have something to eat every now and then, they are very hardy.
Do kefir grains need a rest?
Nope, they can go indefinitely as long as they have food.
Why isn’t my kefir getting thick?
If your kefir isn’t thickening as it should, most likely it just needs more time to ferment. Or if you have just gotten it out of the fridge after it being dormant for a while, it will need several cycles until it thickens as usual.
Is kefir healthier than yogurt?
Homemade yogurt and kefir are both fabulous options for probiotic foods. But since kefir doesn’t have to be heated in the process, a greater diversity of organisms are typically able to proliferate compared to yogurt.
Although if you are on the GAPS diet and just introducing probiotic foods, you may want to introduce more gentle options like yogurt before you add in kefir. Which can be more shocking to your gut if you’re not used to it.

Is milk kefir as healthy as water kefir?
Water kefir grains have fewer strains of bacteria and yeasts than milk kefir. So milk kefir is actually healthier. But both are more beneficial than ferments like buttermilk or yogurt.
Can you make this with store-bought milk?
Yes, absolutely.
Although keep in mind that since raw milk hasn’t had the beneficial bacteria killed off, it will create a healthier and more nutrient dense result.
But if you don’t have access to raw milk, or can’t afford it, then I definitely suggest only drinking store milk that has been fermented with kefir.
Can you make this with coconut or almond milk?
Yes! This is a great option for someone who is allergic to dairy, as you can use almond milk or coconut milk or some other dairy substitute. You just have to do a batch every few times with regular milk to keep the grains alive, because they will start to not be as effective.
Can you store these somehow to go on vacation?
Definitely! I can store these in my fridge for months if necessary. All you do is put the grains in your jar and fill with milk as usual. Because they are cold and dormant in the fridge, they will eat on the milk very slowly and then you can go on a vacation or just take a break!
Expert tips on raw milk kefir:
- Fermentation time depends on the temperature in your home. During the winter my grains take a little longer to get to the thickness that we like. As well as when it is summer and super hot. Keep an eye on the ferment so it doesn’t get too sour to be edible.
- It’s normal for the whey to separate. Don’t freak out if you see that the whey separates in your jar. A lot of times I’ll notice a little pocket of thin liquid in the side of my jar, and that is ok. Totally normal.
- It might take some time for the kefir to turn out good if they are new grains. If you bought some new grains, especially if they were dehydrated, they will need a little bit of time to revive and make super thick kefir.
- Same if you store them in the fridge for a long time and then pull them out to make a batch. They are going to take a few batches to return to normal from being dormant.
Want to learn to ferment more foods?
How to make yogurt in the instant pot
Pin it for later!
Raw milk kefir
Equipment
- Quart mason jar
- Cloth
- Rubber band or mason jar rim
- Plastic strainer
- Wooden or plastic spoon
Ingredients
- 2 tsp kefir grains
- 1 quart raw milk
Instructions
- Place about 2 tsp (a little more or less is fine) into your quart mason jar.
- Fill jar with milk leaving 2 inches of space at the top.
- Place cloth over and secure with a rubber band or mason jar rim.
- Leave to ferment 12 to 48 hours, or until it is sour and thick enough for you liking.
- Strain kefir grains out.
- Drink kefir and repeat process with grains.
Raw Milk Kefir
Can this also be made in a pint jar?!
Yes, of course! Just use less kefir grains or ferment it for less time.
I have a jar of raw milk that hS been in the fridge for over a month now. It has separated. I feel it’s still good to use. Can I use this to make milk kefir?
Hi there! I recently began making Kefir, and I’ve been enjoying it so much! Initially, I used pasteurized milk from the store. However, I used raw milk yesterday, and my grains didn’t produce Kefir. I suspect my grains may not be robust or abundant enough to handle a half gallon of raw milk. I’m afraid that I’ve killed the grains. Do you think they’ll recover, or do you have suggestions?
I purchased raw milk kefir from our farm coop. It sounds like from your recipe instructions, I cannot use this to make my own kefir, as the grains were likely strained out. Is that true? They also sell grains, so I may venture out and get those next time.
My kefir grains were originally used with pasteurized milk. I have frozen them and thawed a few times over the years. They always revive after a few practices with pasteurized milk. I read that if I’m going to revive them and use with raw milk I should revive them with regular milk first. Your thoughts?